How to Secure the WordPress Admin
Published July 16, 2020WordPress is ubiquitous, easy to use, and highly extensible through a wide array of themes and plugins. No doubt these factors are what we love most about the platform, but they also make WordPress a prime target for hackers. Don’t worry; this does not mean we should give up WordPress. There are ways we can protect ourselves and our websites. In this post, we will learn how to strengthen the admin and prevent one of the most common vectors of attack: brute force. Best of all? It’s completely non-technical.
#The Plugin to Save Us
There are many security plugins out there. Sucuri and Wordfence are two I have worked with and can recommend. Jetpack is another, developed by the team behind WordPress itself, which often comes preinstalled. The one we will be using is All in One WP Security & Firewall. I have worked with it more than any other security plugin over the years and have had few issues.
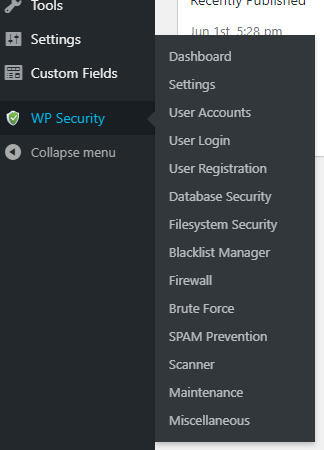
Once you’ve installed and activated it on your site, you’ll see WP Security appear in your admin section, near the bottom of the sidebar menu. This plugin is comprehensive, but does require some configuration. Let’s step through it.
#Rename the Login URL
WordPress powers something like 33% of the web. The login URL for all of these WordPress sites is, by default, /wp-admin (although /wp-login.php also works). Hackers don’t even need to guess the login URL to find your login form! Don’t give hackers an easy in. Let’s change the login URL.

Go to WP Security in your admin section, and go to the Brute Force sub-menu item. Here there are several tabs, but the first one (and default one when you click WP Security -> Brute Force), is the setting to change the default login URL. All you need to do is check the checkbox, and enter your new login page URL. Hit save, and your site is instantly more secure.
#Strengthen the Login Form
If for some reason you cannot change your login URL, or you want to go the extra mile (and why wouldn’t you when we’re talking about security?), we can improve the login form itself. Even if hackers manage to guess your new login URL, they’ll still need to get past your empowered form. There are a couple ways to do this, and for the sake of thoroughness, we’re going to do both of them!
#Adding a Captcha
Most of you are probably familiar with Google’s recaptcha and while this plugin does support that, we’ll be enabling a different kind of captcha: math! Turning this feature on makes it slightly harder for humans (after all who wants to do basic math?) and incredibly harder for bots.
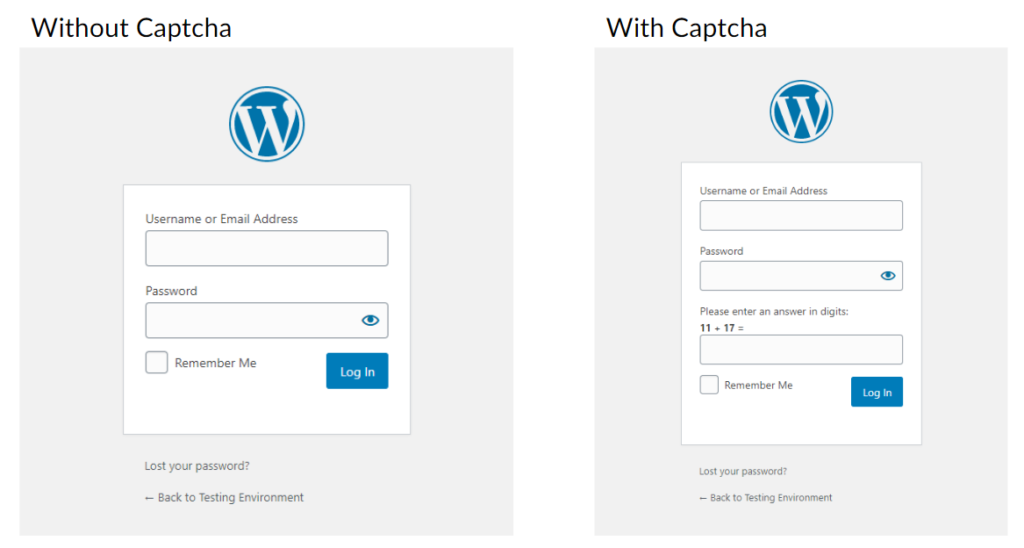
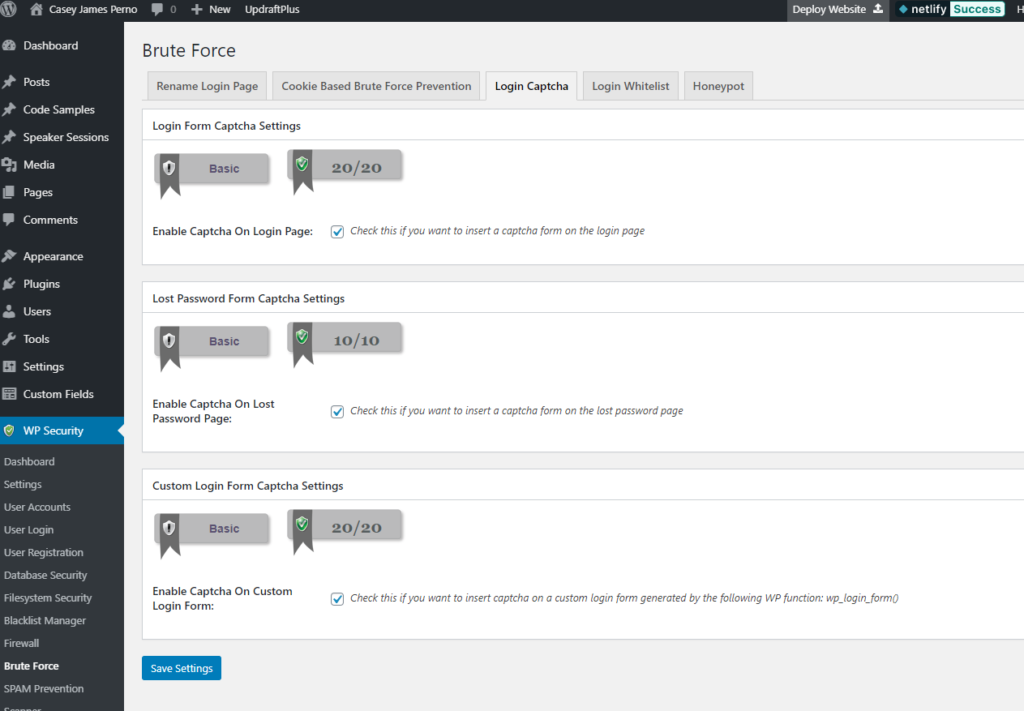
Under the same Brute Force sub-menu we used for changing the URL, you’ll see a tab for Login Captcha. Enable these three:
- Enable Captcha on Login Page
- Enable Captcha on Lost Password Page
- Enable Captcha on Custom Login Form
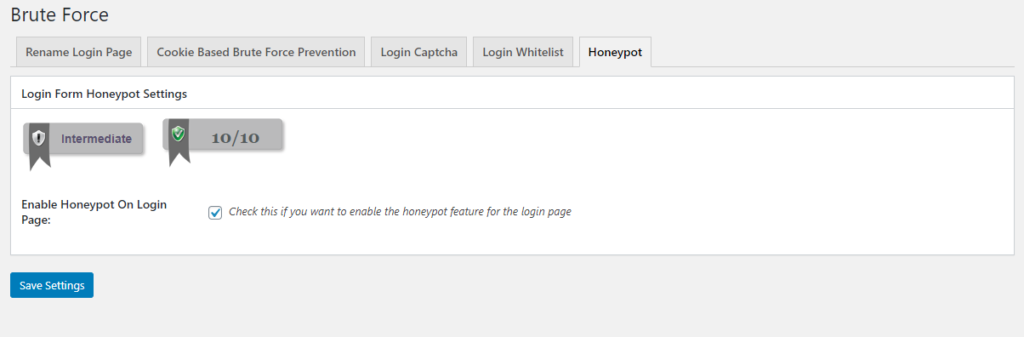
#Add a Honeypot
While a captcha makes it slightly harder for humans and much harder for bots, there’s another type of tool in our arsenal that has no impact on humans while still making it harder for bots. When we turn on a honeypot, we’re adding a form field that is invisible to humans but irresistible to bots. Because humans can’t see this honeypot field, anyone that fills it out instantly gets flagged as a bot and is denied entry.
Still under the Brute Force section, there’s a tab called Honeypot with a single checkbox. Check it and save, and we’re done here!
Now with a captcha and a honeypot enabled, even if a bot is able to find your login form, it needs to be highly sophisticated to get past your newfound protection.
#Lock Out Bad Actors
Attackers can be persistent. We hid and fortified the login form, but that doesn’t mean we should let these bad actors keep hammering away. If given unlimited time, they will eventually crack the code. That’s why we’re going to lock out anyone that looks suspicious. Even locking them out just temporarily will go a long way.
Under the User Login section of the plugin, you’ll find a Login Lockdown tab (it should be selected by default). There are several settings here that we’ll go over.
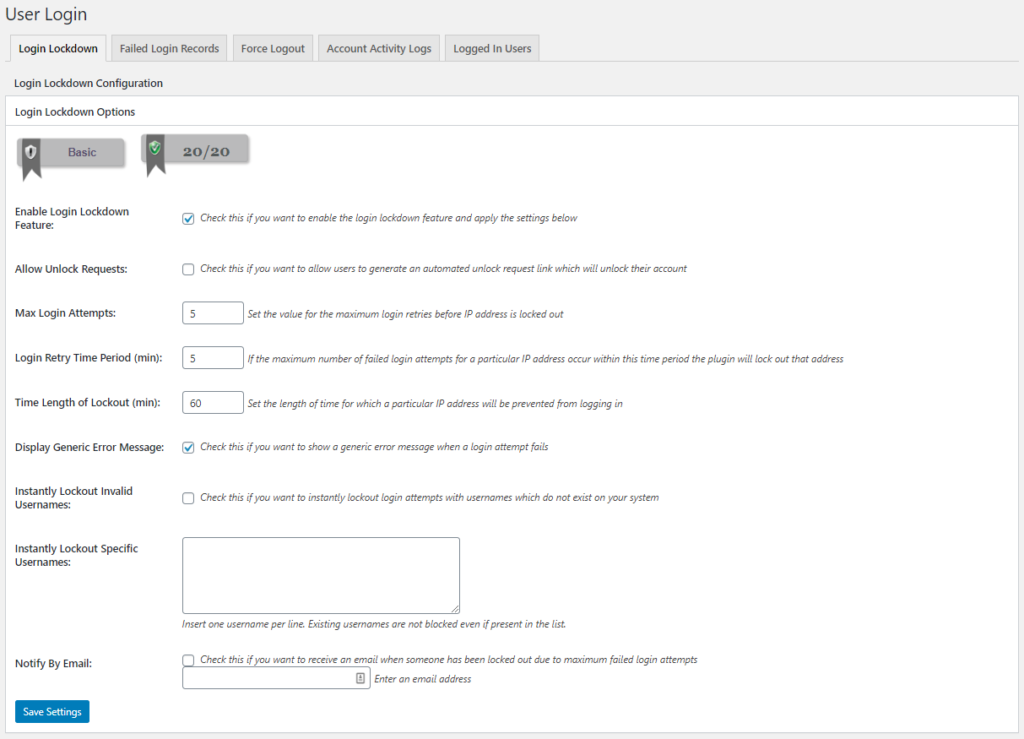
The first one, Enable Login Lockdown Feature, just turns this feature on, so let’s check that. The rest of the settings actually configure it. I personally do not Allow Unlock Requests, but depending on your site you may want to. Enabling this allows users and bots to manually reactivate a locked account.
The Max Login Attempts is how many times a user (or bot) may fail at logging in within a certain period of time. Login Retry Time Period is that period. The default is 5 times in 5 minutes, but you can play with it to find what works best for you. As long as the numbers aren’t too big, it’s gonna help. Time Length of Lockout determines how long to lock out a particular IP address. The default is 60 minutes, but I’ll usually set it at 120.
Display Generic Error Message is an interesting one, and one I encourage enabling. By default, without this plugin, WordPress tells users whether their email or password was wrong. This is helpful for people, but it’s also incredibly useful for bad actors. If a hacker is throwing random usernames and passwords at a login form, and the form indicates the password is invalid, the hacker knows he just stumbled across a valid username. If we enable this setting, the user just sees “Invalid login credentials.”
Lastly, Notify by Email will notify you when someone gets locked out this way. Just check it and add your email, and you’ll get notified when a user locks themselves out. If it’s a genuine accident, you can go in and unlock them. Otherwise, it’s a good way to get notified when your site is being targeted so you can take appropriate action.
#Firewall
The last things we’re going to do is enable a basic firewall and disable XML-RPC. In WP Security, go to the section called Firewall. The default tab should be Basic Firewall Rules (pictured below). There are a few settings here, but we’re mostly interested in Basic Firewall Settings and WordPress XMLRPC & Pingback Vulnerability Protection.
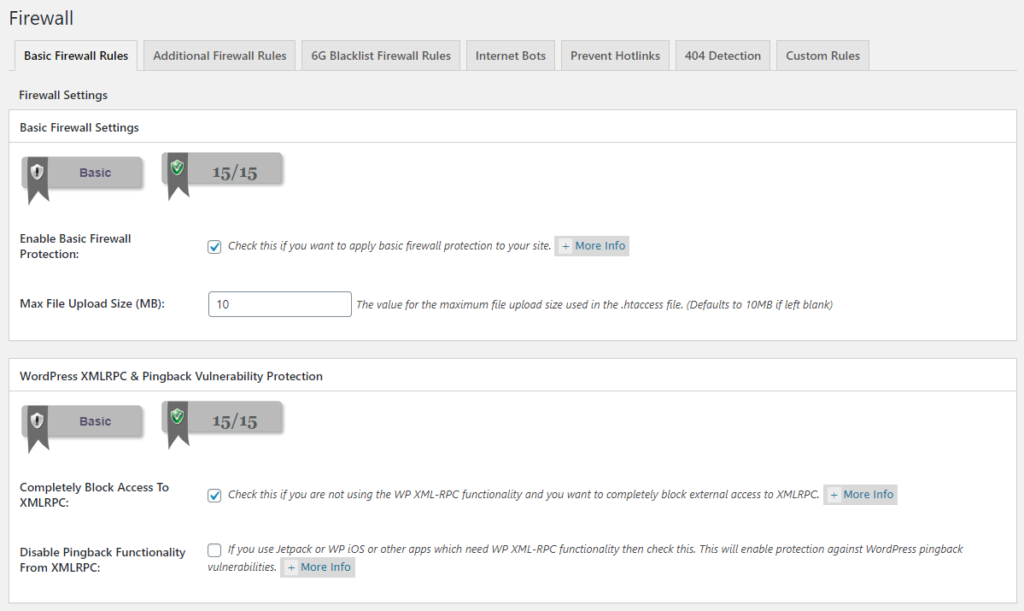
The big thing the basic firewall does is to deny access to both your .htaccess file and your wp-config.php file. While the .htaccess file manages your site’s server configuration, the wp-config.php file contains your WordPress settings. The latter includes very sensitive information, including all the connection settings for your WordPress database. Should bad actors get access to either one, it’s game over. Let’s lock ‘em down.
XML-RPC leaves a back door open for brute force attackers to gain access to your admin or your database. I will generally completely block access. However, there are some plugins that require this functionality. Jetpack is probably one of the most common examples. If you need this Jetpack functionality, or if another plugin you rely on requires this functionality, instead of completely blocking it we can just disable pingback functionality. If you’re interested in learning more about XML-RPC, I have another blog post on the topic.
#Conclusion
Now we have a much more secure website! It won’t block all vectors of attack, so we need to continue to be vigilant, but we have fortified against brute force attacks — one of the most common vectors. I’d like to leave you with some other solid security advice that will help minimize risk in all aspects. Do not reuse passwords. Keep everything up to date. Be diligent in selecting a host, a theme, and plugins (pick trusted brands over cheap knockoffs). Do these things and not only will your WordPress website be secure, you’ll be safe online where ever you go.